🚀 Elevate Your Network Game!
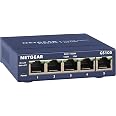
The NETGEAR 5-Port Gigabit Ethernet Unmanaged Switch (GS105NA) offers a simple, plug-and-play solution for high-speed networking. With 5 Gigabit Ethernet ports, it supports seamless connectivity for your devices, all while being energy efficient and designed for quiet operation. Backed by a limited lifetime warranty and expert support, this switch is perfect for both desktop and wall mount use, making it an ideal choice for any professional workspace.


| Data Transfer Rate | 1000 Megabits Per Second |
| Current Rating | 0.5 Amps |
| Upper Temperature Rating | 122 Degrees Fahrenheit |
| Interface | RJ45 |
| Platform | Windows |
| Lower Temperature Rating | 32 Degrees Fahrenheit |
| Number of Ports | 5 |
| Compatible Devices | Desktop |
| Switch Type | Metal |
| Item Weight | 490 Grams |
| Item Dimensions L x W x H | 3.9"L x 3.7"W x 1.1"H |
| Case Material Type | Metal |
| Color | Gray |
M**K
Lots of VLAN configurability, stable performance
A professional network engineer might scoff at this "prosumer"-grade switch, but it does actually have a fair bit of flexibility in regard to its VLAN configuration, and you get a lot of bang for your buck. I bought it so I could connect two Internet gateways (a cable modem and an optical network terminal) to my router's single WAN port and two virtual LANs to my router's single LAN port. Despite the two passes that packets need to take through this switch on their way between the Internet and my LAN devices, I can still download the latest Chromium sources from Google at over 100 MiB/s (average over the course of a 2-GiB+ download) through my gigabit Internet link, so I know the switch matrix is doing a good job at keeping the crossing flows from colliding.To pull off having two gateways connected to one WAN port on my router, I have two 802.1Q-tagged virtual interfaces configured on my router's WAN interface with distinct tags that I assigned as the PVIDs of the two switch ports that the gateways plug into. Each of those two switch ports is configured to pass the traffic of its respective VLAN untagged since the cable modem and the ONT are not expecting 802.1Q-tagged Ethernet frames. Then the switch port that is connected to my router's WAN port is configured as a member of both of the gateway VLANs and is configured to pass their traffic with tags so that my router can run its two virtual interfaces on its one WAN port. That switch port has its PVID set to a throwaway VLAN (of which no other ports are members) so that any untagged traffic coming from the router's WAN port will be thrown away and will not leak to the remaining five switch ports that connect my internal LAN.Those other five switch ports, which I use for my LAN, are members of two more VLANs, one of which is set as their PVID, meaning any untagged traffic they receive gets assigned into that VLAN, and also they are configured to pass any traffic on that VLAN in untagged frames. The other VLAN is for my isolated Internet-of-Things network so I can have remote Wi-Fi access points hosting a dedicated SSID just for my IoT devices. The LAN switch ports are configured to pass traffic on the IoT VLAN using tagged frames, so the IoT network is "invisible" to other switches and hosts unless they intentionally connect to it. The router's LAN port runs both the default (untagged) interface for the trusted VLAN and also an 802.1Q-tagged virtual interface for the IoT VLAN, and those two interfaces are addressed on separate subnets with some firewall rules to prevent IoT devices from connecting to trusted devices, but trusted devices can connect to IoT devices (to command them, read status, etc.).The reason I described my complex setup here is so you could get an idea of how much flexibility this switch offers. Sure, it may not have the kind of Cisco-esque management console that network engineers are trained to endure/love, but the switch's web interface is actually shockingly capable of configuring almost any bizarre VLAN arrangement that you can imagine. And there are actually three other VLAN configuration modes that I did not even describe: a basic port-based mode, an advanced port-based mode, and a basic 802.1Q mode. (I use the advanced 802.1Q mode.)As far as the physical build of this switch goes, it looks and feels exactly as you would expect a Netgear desktop switch to look and feel if you are at all familiar with them. It's a sleek metal slab with a line of Ethernet ports along the front edge and a 12V DC barrel jack on the rear. Each port has two LEDs that show link speed/status and activity, so you get your typical blinkenlights show. The 12V input is nice because it allows me to put this switch on my 12V battery backup along with my router and my two gateway devices. The four devices will easily run for many hours in a power outage.As for reliability, I have never had this switch hang or lose performance with prolonged use. It runs silently for months to years with no intervention required. It just works, even despite the crazy configuration I gave it. I have no complaints at all.
L**.
NETGEAR SWITCH
I checked out this item on google then went online to their website for directions. I had one installed on my system. I was AMAZED to see how simple it installation is. The newer models seen to work on all small to large sized systems. The second on installed the switch and powered it on system, it was fuctioning on my computers
A**X
excellent
excellent
E**B
GS105 compared to cheaper GS305
I have purchased both models. The main reason I also have the more expensive GS105 is that in this model, each Ethernet port has 2 led indicator lights, to show whether a connection is running at 10, 100 (fast Ethernet), or 1000 Mbps (gigabit Ethernet). This is probably just a nerdy indulgence 😁, along with a recently added gigabit fiber Internet service 🙏.The attached photo shows several ports operating at gigabit speeds, but one port (with orange wiring) operating only at 100 Mbps (because this port connects downstream to some old CAT5 Ethernet wiring).The GS305 does not show connection speed - its single led indicator only shows if the port is active.
P**T
Nice BCM53128 switch with flawed management interface (can disable via hardware hack)
PROS:- true 802.1q VLAN tagging support, at a very low price- excellent wire-speed performance, tested @ 950+Mb/s in iperf on 6 ports at once, so long as Flow Control is disabled (see below). The main chip is a Broadcom BCM53128, which seems slightly faster and more efficient than the Realtek RTL8380 used on competing switches from TP-Link and Zyxel.- very low power use, approx. 1W - 3W dependent on ports in use (~ 0.25W DC / 0.45W AC base plus 0.3W per connected 1000M port, or 0.2W per 100M port). Traffic levels seem not to affect this much, though cable length might, since it tries to use lower transmit power on short cables. The switch-matrix core runs on 1.2V, with 3.3V for I/O, both provided by efficient switchmode buck regulators (unlike some switches that use a hot-running, linear step-down from 3.3V to 1.2 or 1.8V, at < 50% efficiency).- silent operation, with no fan or coil whine. Despite the lack of a fan, mine never even gets noticeably warm. There is a reasonably sized heatsink on the main chip, and a thermal pad under the PCB, allowing the case bottom to serve as an additional heatsink.- good build quality. Just one electrolytic capacitor, which is a Nichicon (reputable Japanese brand) 220uF on the power input, over-rated at 25V when operating at 12V. Main switch chip is a Broadcom BCM53128. Case is solid metal, compromised slightly by a stick-on platic piece around the ports for labeling, which another reviewer complained about.- happily runs on the variable 12V battery bus (10.5-14.4V) from an offgrid DC power system- starts up quickly, from cold-powerdown to forwarding traffic in about 8 seconds, far faster than any "true" managed switch (Catalyst, Juniper, Procurve etc.)CONS:- management interface, whether via web or Windows app is limited and cumbersome, especially when configuring VLANs, though is most cases this is only a one-time annoyance, set-and-forget- typical of switches in this class, there's no CLI management, nor SNMP, so tracking port activity with MRTG, etc. is not possible. Omitting these probably does reduce both cost and power use, though.- The management controller, integrated within the BCM53128 is a weak CPU derived from the 1980s-vintage, 8-bit Intel 8051, which is easily overloaded. This explains the lack of HTTPS SSL support, occasional dropped HTTP requests, etc. It's actually impressive they managed to squeeze an IP stack and web interface onto such a small CPU at all.- This limited 8051 service processor would only affect management functionality (it isn't part of the main switch-fabric data path at all), except for a dumb decision on Netgear's part to configure the switch registers to send a copy of *all* HTTP (tcp port 80) traffic, originating from any port, to this tiny management CPU.This has the effect of badly crippling the layer-2 Flow-Control feature, causing any and all HTTP traffic flowing through the switch to be bottlenecked to about 10Mb/s whenever Flow Control is switched on. The reason is that flow-control rate limiting kicks in whenver any port receiving the traffic gets overloaded, the weak management CPU effectively connects to a internal 9th, on-chip port that seems to run at only 10Mb/s, AND all web traffic from anywhere to anywhere (even when bearing an 802.1q VLAN tag!) gets uncontrollably copied to the phantom port-9.This wouldn't be so bad if the web interface could be moved to a less important port than tcp/80, set to listen to requests only from one specific switch port, or disabled entirely (until next power-cycle, say, or even semi-permanently until a factory reset), but none of these options are provided.Netgear does seem to ship these switches with Flow Control turned OFF by default, masking the performance problem, and in many cases Flow Control is undesirable anyway, but it can be useful in cases where a node on your network can't keep up with full Gigabit rates, but can do better than 100M. Many low-power single board computers fall into this category and can benefit from FC.The management controller can also be a big security hole, since it doesn't respect VLAN boundaries at all, and copies of its transmissions get relayed to ALL ports, in-the-clear and untagged, regardless of VLAN membership status. The switch effectively reverts to just a dumb hub whenever the hidden Port 9 is involved.HARDWARE MOD:If you don't mind voiding your warranty with a small bit of soldering, it's thankfully possible to disable this ill-behaved web interface and completely disconnect the BCM53128's 8051 management controller from its switch fabric, eliminating its security exposure and letting Flow Control work as intended, with no more weird slowdowns affecting port 80 . Here are the steps:1. First Get everything configured as you like in the web interface, setting up and testing all VLANs, etc. Reboot the switch and verify it comes up in the desired configuration.2. Open the cover and find tiny surface-mount resistor R75, between the main chip and the ports, near the crystal oscillator. Desolder this resistor. See my first photo, where it's already been removed, leaving bare pads.R75, which I measured at 4.4k in-circuit, pulls BCM53128 pin 43, "EN_8051_TxRx" high, to 3.3V. It CAN just be left floating if you don't mind losing the web (and Windows-config-tool) interface permanently after initial setup.3. If you want to be able to toggle the web interface off and on, solder a very fine-gauge wire to the removed R75 resistor's pad nearest the main chip, and another such wire to a 3.3V power pin anywhere on the board-- you could use the other side of R75, but it's easier to grab this voltage from a less closely-spaced area. I chose to use the power pin (pin 8) of U5, the 8pin serial EEPROM at upper-right.4. drill a hole on the back panel somewhere to mount a small toggle switch. Solder one of its terminals to the R75 pin (BCM531128 pin43, EN_8051_TxRx signal) through a 3.3k-ohm resistor. Solder the other toggle switch terminal to any convenient 3.3V pin, through a 1k-ohm resistor (optional - these two resistors in series approximate the original 4.4k-ohm pullup, but anything in the ballmark should work)Note that EN_8051_TxRx is only latched during reset, so after flipping the switch you have to power-cycle the switch for it to take effect. At least this Netgear is fast to reboot, but having to do so makes its port traffic & error counters effectively useless, unless you leave management enabled all the time.If you want to add a RESET button also, solder a fine wire to the right-hand (near the coil) terminal of resistor pad R7, which should be empty to begin with. This goes to the Shutdown terminal of the 3.3V switchmode regulator, and grounding it (through a 1k-ohm resistor) even briefly will cause a clean reset via 3-pin power-supervisor chip U3. That IC actively drives the BCM53128 RESET pin both high and low, so you can't safely pull RESET down directly.Rather than mounting a physical toggle switch, since my GS108e is in a hard-to-reach spot I decided to bring out these control signals (EN_8051_TxRx, +3.3V, RESET-via-regulator-shutdown) to a 4-pin header, which plugs into GPIO outputs on a nearby router, allowing management-enable and reset functions to be controlled remotely. Anyone going this route should ensure both systems share a common logic ground, and take care to never drive either signal to more than 3.3V Documentation on the BCM5128 is hard to come by, but I very much doubt it's 5V-tolerant.
Trustpilot
2 months ago
1 month ago