


🎨 Unleash Your Style with Every Game!
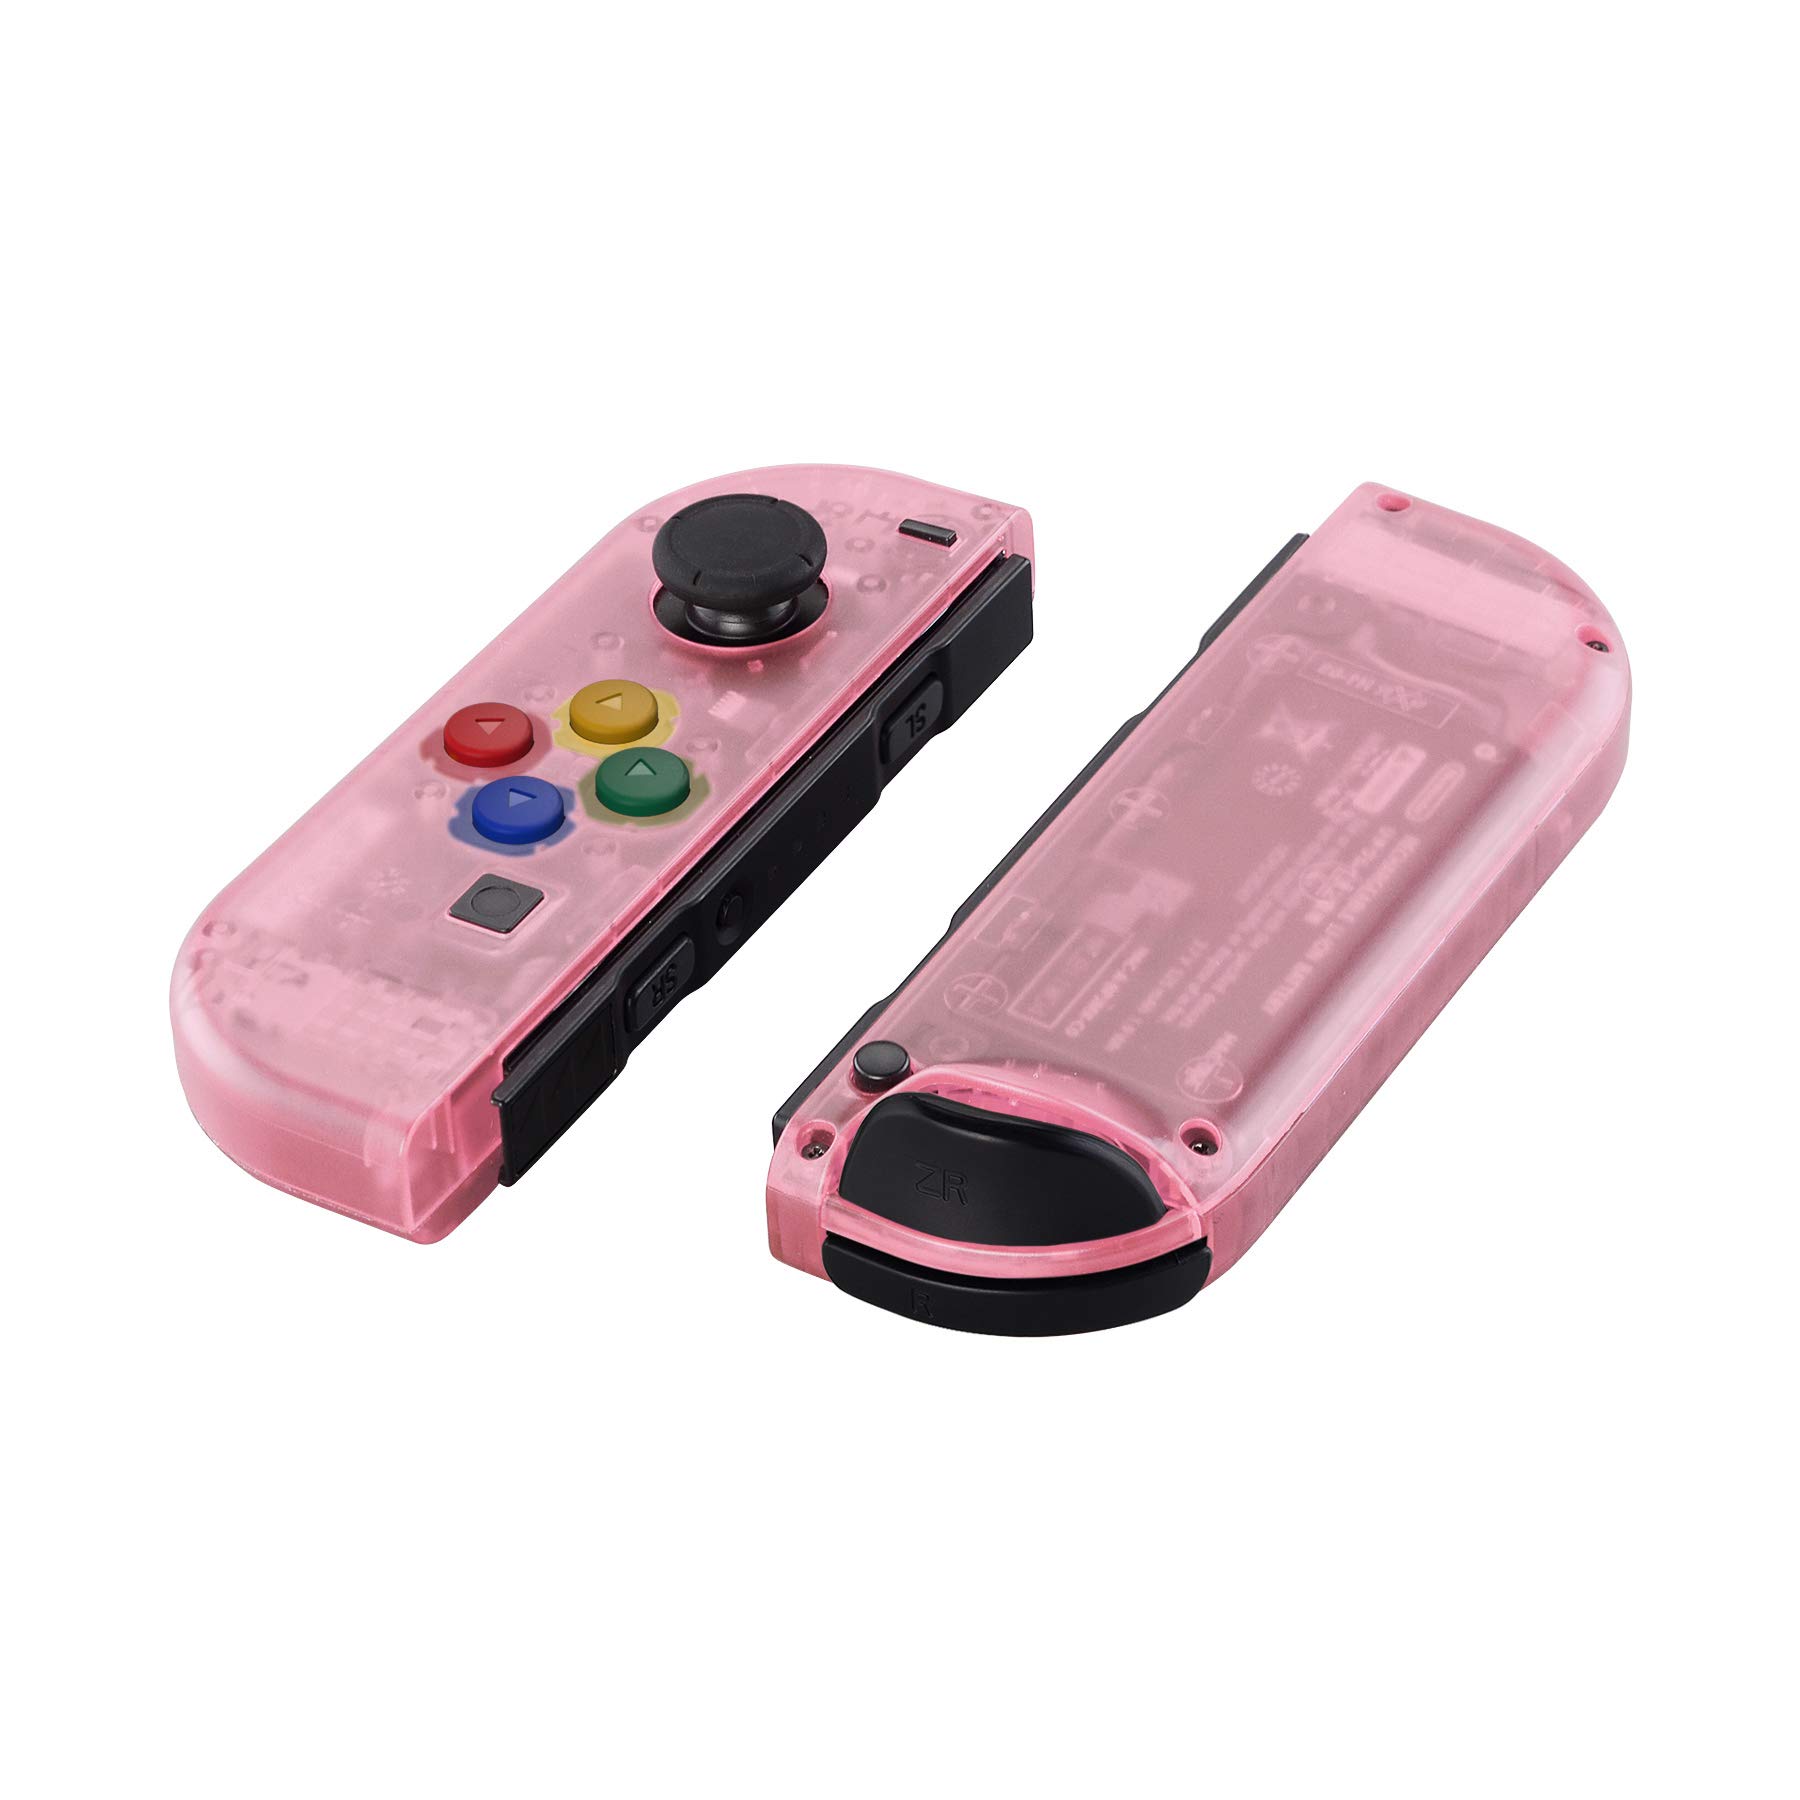
The eXtremeRate DIY Replacement Shell Buttons for Nintendo Switch & Switch OLED offers a unique and vibrant cherry pink custom housing case designed for Joycon controllers. This premium ABS shell is perfect for gamers looking to personalize their console while ensuring a precise fit and durability. Installation requires moderate electronic skills, and the package includes all necessary tools for a seamless upgrade.
A**G
Foolproof instructions, helpful tools, very cool look.
I bought this shell replacement and hall effect stick replacements for my drifting launch day joycons. I swapped the shell and sticks in about an hour and a half total. The video instructions for installing the shell were thorough and the tools included with the shell replacement kit were extremely useful. I kept the original black buttons instead of the included SNES color buttons. Looks dope.The right joycon is a little tight to get together - this is an issue with the extra hardware packed in the joycon and not the shell housing.
K**K
Very cool shells!
I love having the frosted kinda clear joycons that look like the gameboy color I had when I was like… 6 maybe???I didn’t use the clear buttons that came with this, instead leaving the black Dpad buttons etc because I liked the way it looked better.The shells were fairly easy to swap out. The set came with an entirely extra set of screws which is great because they are teeny tiny.The hardest part about swapping the shells out is getting the connection put back right that reads the amiibo cards or whatever under the right hand joycon.
O**Z
Difficult to put together if you never put anything apart and together again before.
Difficult if you never put an electronic device apart and together again. Please watch a tutorial first and watch it again and follow along exactly what they do. NEVER FORCE ANYTHING OR SOMETHING WILL BREAK OR TEAR! When you finally put your customized shell on your joycon make sure nothing is damaged or anything is missing or misplaced before you screw the front and back shells together and test all the buttons to see if it works 100%.
E**N
Looks amazing. Surprisingly difficult to install. Creaks in Joycon grip.
First off, the color gradient is absolutely stellar. If these are sold on looks they are a 100% buy. Unfortunately you actually have to hold them in your hands. The full glossy texture is quite slippery. Apparently that slightly satin coating on standard JoyCons was actually engineered that way. Furthermore, when installed in the JoyCon grip the full glossy texture has a stick/slip behavior against the grip, and it creaks constantly. The install was difficult but that was not the manufacturer's problem; that's just how JoyCons are. If you have fully disassembled and re-assembled a cellphone or tablet post ~2016 you can manage JoyCons.
F**K
Retro vibes
The good old days of Nintendo with all the clear shells!The set comes with a set of tools (triwing [shell], Phillips (inner parts]. I followed an ifixit tutorial and finished in 1 hour as a novice, but I took my time to ensure that I didn't snap any ribbon cables. Take your time and enjoy the process of tearing down and reassembling your joy cons, it's a fun learning experience!
S**E
Complicated, But Great!
I was hoping these would be a similar dark color to the base pro controller shell - unfortunately this isn't the case! However, they still look great. The shells have a nice matte texture, different from the smooth one on base joycons. Feels a little grippier. I followed a video from CptnAlex on YouTube which showed you how to do the shell swap without removing any ribbon cables, and it worked great. Take your time - the swap took me about 2 and a half hours. The hardest buttons to do were the home and plus/minus buttons, and the RFID sensor was very annoying to transfer. I also kept the base grey battery housing so I wouldn't have to go through swapping the triggers, but since I got clear black it's hard to notice I did this. I also didn't use the provided buttons and triggers and stuck to the stock dark grey. Overall the look is fantastic!If you've never done anything electronics related in your life, I would err on the side of caution with this swap - there's a lot of little fiddly cables and screws. If you're experienced, this should be a breeze. I actually didn't hate the stock screwdriver provided and didn't strip any screws, you just need to use it like an actual screwdriver and apply force when turning. Test your buttons as you go if you can, and try to keep a clean workspace. Overall not that hard of a swap, just complicated, a little finicky, and first-timers will need more time. Good luck!
J**Y
they look great!
When I was a kid they made transparent controllers for nintendo consoles called "jellies". I had to have jelly everything. N64 controllers, camecube controllers, I was obessed. It's dissapointing that nintendo no longer sells transparent controllers. Tjanks to these casings, I'm over the moon that I can have jelly joycons. Instead of using the multi-color buttons that the casings come with, I purchased a set of opaque buttons in the color "cherry blossom." I think that the casings and the buttons I purchased are from the same provider. The casings themselves are pretty much replicas of the original joycon casings, and they are just as thick. The casings came with spare screws, springs, and screwdrivers. I actually liked these spare screws so much that I replaced my old screws even though the majority were fine. The screws provided in the kit seem sturdier, and they are certainly less prone to stripping, which is a huge issue with switch screws. I wish that a prying-pick had been included in the kit for popping the back of the joycon away from the front. And I wish that a pair of tweezers had been included. You will want to definetly get your own tweezers, specifically angled precision tweezers. My biggest issue is that these casings did not come with instalation instructions. However, after watching a disassembly video for joycons on youtube, I kind of understand why. If directions had been provided it would have undoubtedly been a thick booklet. Installing these casings and the new joysticks and buttons took me about 4 hours. If you're willing to spend an afternoon stressing over something tiny and fiddly for the sake of the aesthetic, I reccomend these casings.
S**T
Really solid shell replacements
These look great, not too bad to install if you follow a guide, and really stand out compared to standard switch controllers. I have some 2 sets so far and have been debating what color to do next for my 3rd set of controllers.
G**
Bought 2 sets, one seems really good, the other not so much.
I bought two sets of the atomic purple shells a month apart for two sets of joycons, the first set is and continues to be fine and look great, however the second set which has only been installed for a couple of weeks seems to have cracked in various places, unsure why as it’s not been dropped or man handled. Maybe a bad batch??Anyway can’t fault the first set and they look and feel great.
D**H
Quality Plastic and perfect fit
So much better than cheaper alternatives which flex and don’t line up correctly.The material is feels sold and the colour is great for showing off the insides. Nintendo should’ve designed options like this!Can be tricky to swap all the parts over so watch a video or iFixit guide so you don’t forget anything.Don’t bother with the cheaper ones as you’ll regret buying them and won’t get your money back.
D**E
My 90s childhood is screaming with happiness
I love them! Got my husband to install them but the process was easy if you know what you’re doing with electronics, keep things organised and have a guide. I would try the next myself after watching him and a few YouTube videos- but watch out for the parts being tiny and hard to find on carpet if it drops- think Lego.Love them though
A**N
Very nice!
Great set of shells! These look wonderful and I'm really happy with the result.One thing I'd say is do not use the Tri wing driver provided! It is super cheap looking and WILL strip your screws. I recommend getting a proper Y00 screwdriver for about £5 on Amazon.The Phillips head (+) screwdriver was fine. Just take it slow when unscrewing.Didn't use the buttons provided as I wanted to maintain the originals.The screws provided look okay but cannot comment on them as I again kept the original ones. The springs provided looked decent as replacements for the trigger springs but I didn't use them. They do look very similar to the original springs though.You don't need to take out many wires! I recommend getting electrical tweezers. Watch this video of this guy on YouTube that does it in under 10 mins without taking wires out. You can do it slower but knowing you don't need to completely take apart your joycons is very good to hear.
H**H
The cherry pink shell and the white buttons are perfect together!
I had bought a pink joycon shell set from ExtremeRate before and was really happy with it, but wanted to change it up a bit. That's when I chose to buy the translucent pink ("cherry pink") shell with white buttons.Both products were of extremely high quality and were a really good fit; both the main shell and buttons were really well produced, making the shell swap that bit easier! The extra springs that came with shell were also a very welcome addition...Super happy with how they've turned out (they give me GBA vibes), will definitely purchase from ExtremeRate again!
Trustpilot
2 weeks ago
1 month ago