🚀 We’re in Beta!
Meet our new design. Everything works as usual, but if anything feels off, give us a ping.


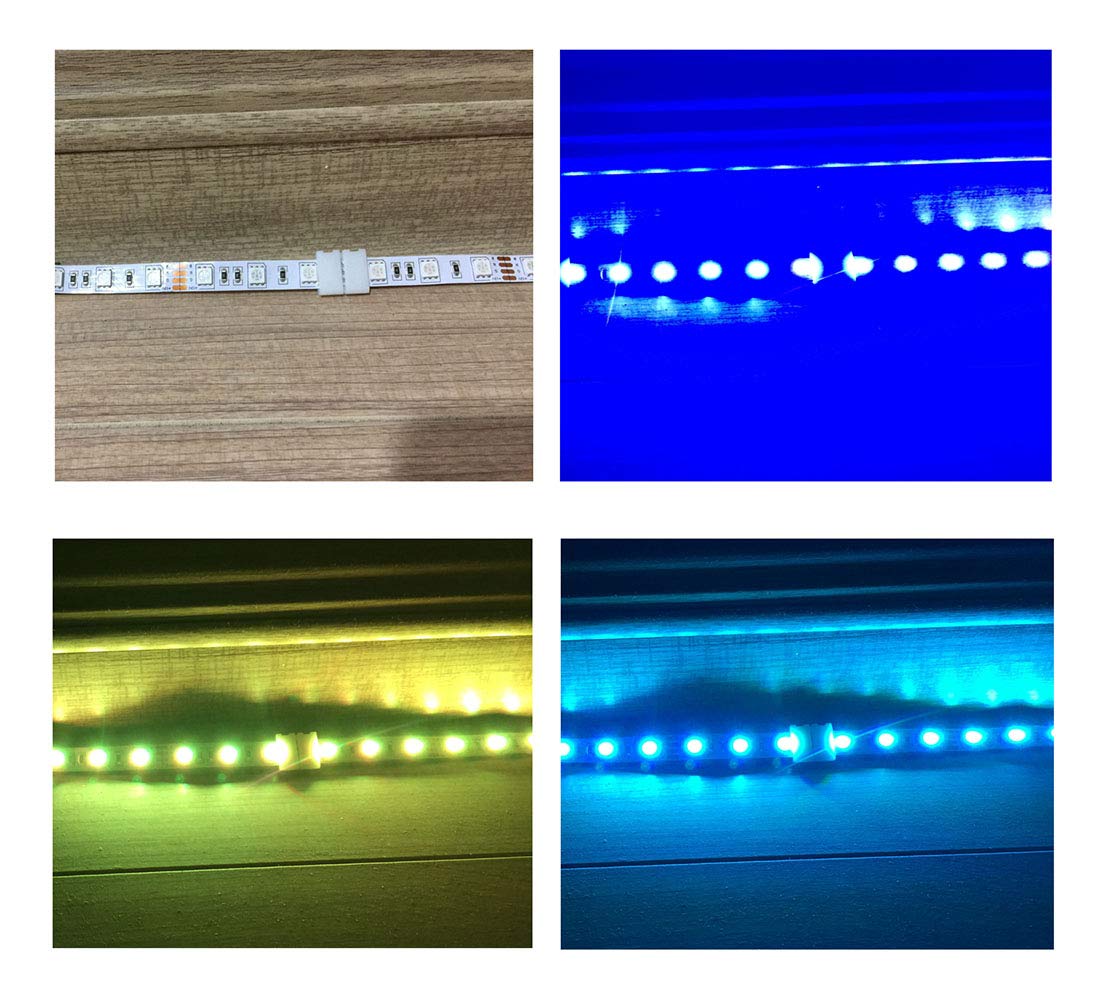


Installation Instructions: 1.Ensure your section of LED light strip has 4 contacts (+, B, R and G). 2.Open the white clasp of the connector. 3.If you use waterproof LED strip, you should peel off silicon on the surface around soldering/Cutting line area, then insert the LED light strip into the clasp, with the 4 contacts of the led strip under the 4 prongs of the connector- make sure to match the + side of the strip to the + side of the clasp; If you use non-waterproof LED strip, just insert the LED light strip into the clasp, with the 4 contacts of the led strip under the 4 prongs of the connector- make sure to match the + side of the strip to the + side of the clasp. 4.Close the clasp. 5.Gently pull the LED light strip to confirm you've made a solid connection.Important note: If the LEDs flicker or do not light up, it is because there is poor contact between the connector and the LED strip. To solve the problem, please follow these steps: 01.Power on your LED strip. 02.Open all the caps of the connector. 03.Insert your LED strip into the connector, slightly pull and push your LED strip to adjust the contact points between the 4 copper contacts on your LED strip and the 4 prongs in the connector. If the LEDs still do not light up, please use your finger to press a little hard on the 4 prongs in the connector.Package includes:20x Clasp Connectors for 10mm wide RGB 5050 LED Strip
Trustpilot
2 weeks ago
1 month ago